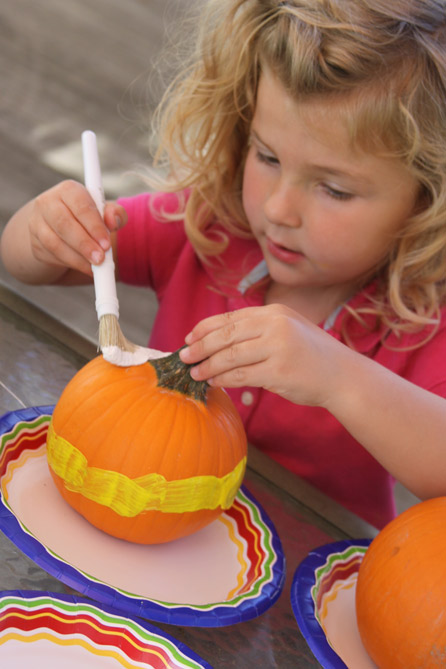
This is the most fantastic time of the year, in my humble opinion. Anything that allows us to be outside enjoying the fresh, crisp fall air is something that I don’t want to miss. With some serious life changes happening in our family this year, projects are getting fewer and far between, but they are also getting more precious, simple, and joy filled too. Here is a fun little after school fall activity that anyone can fit into their busy schedule. Cute little candy corn painted pumpkins – just right to decorate for fall in a sweet and… not so spooky way!
Category: Home Decor
DIY Signs – Adding Charm To The Outdoors
While most of my recent blog posts have, obviously, centered around entertaining the kids over their summer break, I haven’t completely strayed away from my crafty ways, there has just been little time to share it with you all. Since we spend most of our time in the summer outdoors, I do find that I try to make the spaces that we hang out in a little more inviting. Today I wanted to share with you three of my favorite DIY outdoor signs that I have made to decorate our outdoor spaces and add a little bit a charm. I love making signs, because I get to create them exactly the way I want them, instead of looking for pieces that fit the bill. They always turn out to be exactly what I need.
Repurposed Serving Tray To A Chalkboard Welcome Sign
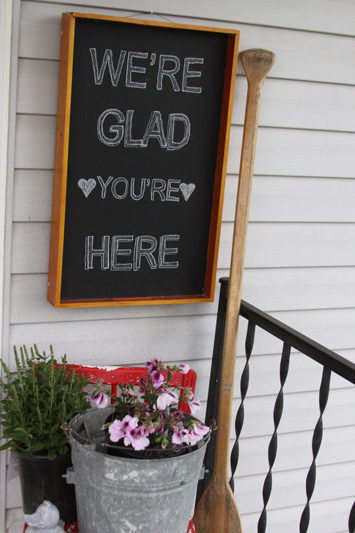
Summertime is just around the corner and now that the weather is getting nice we are spending a ton of time outdoors. Along with preparing the garden, doing some spring cleaning, and breaking out the summer decor we added a new welcome sign by the front door. I received this serving tray almost 9 years ago as a wedding gift, and I bet I used it twice over those 9 years. It was really neat and nice, so I didn’t really want to get rid of it, so I decided I would just re purpose it into something that I would use and love. A can of chalkboard paint and some painters tape took this unused serving tray and transformed it into the perfect welcome sign for the front porch.
Continue reading Repurposed Serving Tray To A Chalkboard Welcome Sign
Repurpose A Crib Mattress To Make A Kid’s Book Nook
If you have school aged kids in your home, you probably spend a huge amount of time reading with them. Our kids spend countless hours every week reading with us or reading by themselves, and we are now amazed that they are reading to US! Probably one of the most amazing parenting moments so far has been to have our baby reading US a bedtime story! Here is a way to re purpose that baby crib mattress, now that your kids don’t use it anymore! The combination of a simple mattress on the floor covered in a cute fabric, a row of rain gutter bookshelves, and stacks of cozy pillows makes for a kid friendly space that your kids will never want to leave! You can create a book nook for your little ones to enjoy for years to come!
Continue reading Repurpose A Crib Mattress To Make A Kid’s Book Nook
Recycle Kid’s Outgrown Clothes Into Play Pillows
Ever catch your child running around in a way too tight shirt that you know they dug out of the “too small” bin in the basement? They promptly tell you that the shirt fits just fine even though their belly is sticking out, and they can bearly fit their arms into the sleeves. You know those favorite shirts that they just can’t seem to get enough of! Here is a way that I have discovered to make those favorite shirts last just a little bit longer. Instead of packing them away or donating the kid’s favorite outgrown clothes I love to make them into little pillows that they can use for play. They are perfect for dolly cribs or for their favorite stuffed animals to use in their beds. They get to see their favorite shirt everyday and play with it too.
Continue reading Recycle Kid’s Outgrown Clothes Into Play Pillows
Budget Kitchen Island Makeover
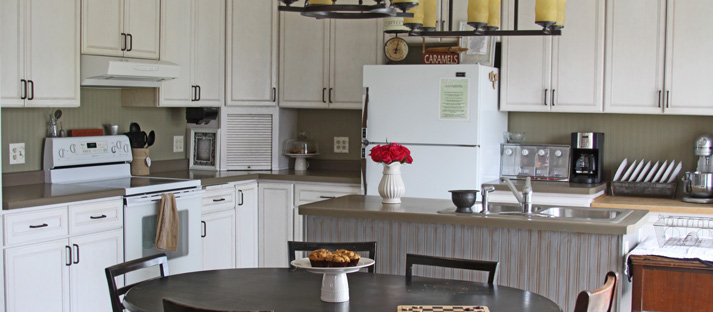
As I mentioned in my last post I wanted to go into a little more detail on how I wallpapered, painted and then distressed our kitchen island. I am going to guess that the total cost to change up our kitchen island was less than $6.oo. I used paint colors that we had left over from other projects and less than half of a roll of paintable bead board wallpaper. This is a great option if you have a kitchen island that doesn’t get a lot of abuse and needs a makeover – it looks pretty and the price is certainly right! You can read all about my budget kitchen makeover here, but here is the skinny on the kitchen island itself. A simple paint glaze I used added a great distressed finish to add a ton of character to our kitchen.
Kitchen Backsplash Using Beadboard Wallpaper- Transform Your Home On A Budget
Today I am bringing you a super budget friendly way to completely transform your kitchen for about $12.00. Need an inexpensive, quick fix for a so-so kitchen? Well here it is. Textured, paintable wallpaper turns a drab back splash from boring to polished in just a few easy steps. No power tools, no expensive supplies, and no contractor bills. Plus this is an easy way to change things up without a permanent damage to the walls that would be expensive to remove and replace like tile back splashes. This stay at home mom did it all on her own after bedtime while her kids were fast asleep and you can do it too.
Continue reading Kitchen Backsplash Using Beadboard Wallpaper- Transform Your Home On A Budget
Homemade Christmas Decor – Burlap Pillows
Last week I shared with you the first three out of four DIY Christmas projects that I have been working on that involve burlap. Something about the simple natural texture of burlap, makes me want to create everything that I can with it. With my leftover yard or so of burlap I created three very simple, but pretty decorative pillows to add to our Christmas decor. Burlap, stuffing, thread and a sewing machine were all I needed to make these pillows, but some red craft paint and a stencil of the words Peace, Love, and Joy transformed them into a special addition to our home for the holidays.
Make Your Own Personalized Photo Christmas Ornaments
Photo ornaments are a perfect way to add a special ornament to the tree each year to commemorate each Christmas. They also make a fabulous gift for the people that you are closest too. I have been creating an ornament each year to add to our own tree, and for the kids to give to their Grandmas, Grandpas, Aunts, and Uncles for their trees too. Buying personalized ornaments from stores or photo labs can be really expensive, especially if you are buying a lot of them at once. Here is a great way to create personalized photo ornaments at home for a fraction of the cost that are just as beautiful.
Continue reading Make Your Own Personalized Photo Christmas Ornaments
Framed Picture To Temporary Christmas Decoration
Here is a quick trick I use around the holidays to transform framed pictures into temporary holiday decorations. Making those framed pictures fit in with your holiday decor is super simple, and it takes just minutes to transform them to fit the season. Pieces of fabric inserted into a frame can be as simple or festive as you like and make a big impact without a lot of money or time. You can then add window clings, or wall decals to make your frame sparkle and shine with Christmas flare without damaging the glass. It is a totally temporary solution for the holidays, super inexpensive, and easy too!
Continue reading Framed Picture To Temporary Christmas Decoration