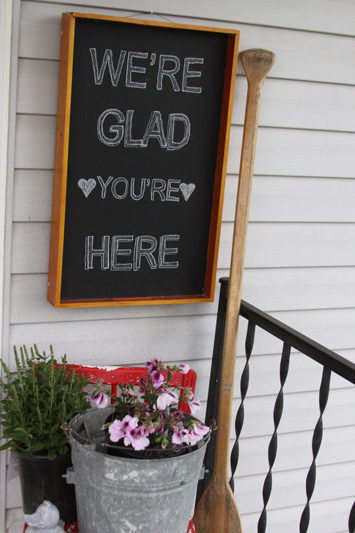
Summertime is just around the corner and now that the weather is getting nice we are spending a ton of time outdoors. Along with preparing the garden, doing some spring cleaning, and breaking out the summer decor we added a new welcome sign by the front door. I received this serving tray almost 9 years ago as a wedding gift, and I bet I used it twice over those 9 years. It was really neat and nice, so I didn’t really want to get rid of it, so I decided I would just re purpose it into something that I would use and love. A can of chalkboard paint and some painters tape took this unused serving tray and transformed it into the perfect welcome sign for the front porch.

Making this sign was really very simple. It actually probably took longer to write the message on it with chalk than it did to re purpose the tray. I had a can of chalkboard paint left over from another project, so I had everything on hand at home to create my message board. I used blue painter’s tape to tape off the areas around the inside of the serving tray. I then put on two thin layers of chalkboard paint using a brush (letting each layer dry completely first).

I added a nice sturdy wire to the back for hanging and that was all there was to it. My serving tray is now a nice sized chalkboard that I can hang anywhere I like. I have had it hanging in the house in the kitchen for a while (like in Our summer fun list post) , and now have decided that it would be a nice addition to the front porch to greet our company.

Check out this great tutorial over at My Sweet Savannah (one of my favorite blogs) that I used on how to turn graphic fonts into awesome chalkboard art! You basically use a printed message as a “stencil” to get perfectly written, and really interesting fonts in chalk! You can use any great decorative font and transfer it to a chalkboard! I print out my words the size I want them, color the backside of each letter in with chalk and then tape them in place where I want them on my chalkboard. I then use a pencil eraser to rub over the entire letter transferring the chalk image to the chalkboard. I then remove the paper, fill in around the letters with a thick line of calk, and any any details that I might want. Fun… and a great way to change things up in your home whenever you want!